
Basic Sudoku Solving Techniques: Master the Logic
Mastering Sudoku relies entirely on systematic logic and deduction. Once you know the rules, the next step is learning how to analyze the grid to find missing numbers efficiently.
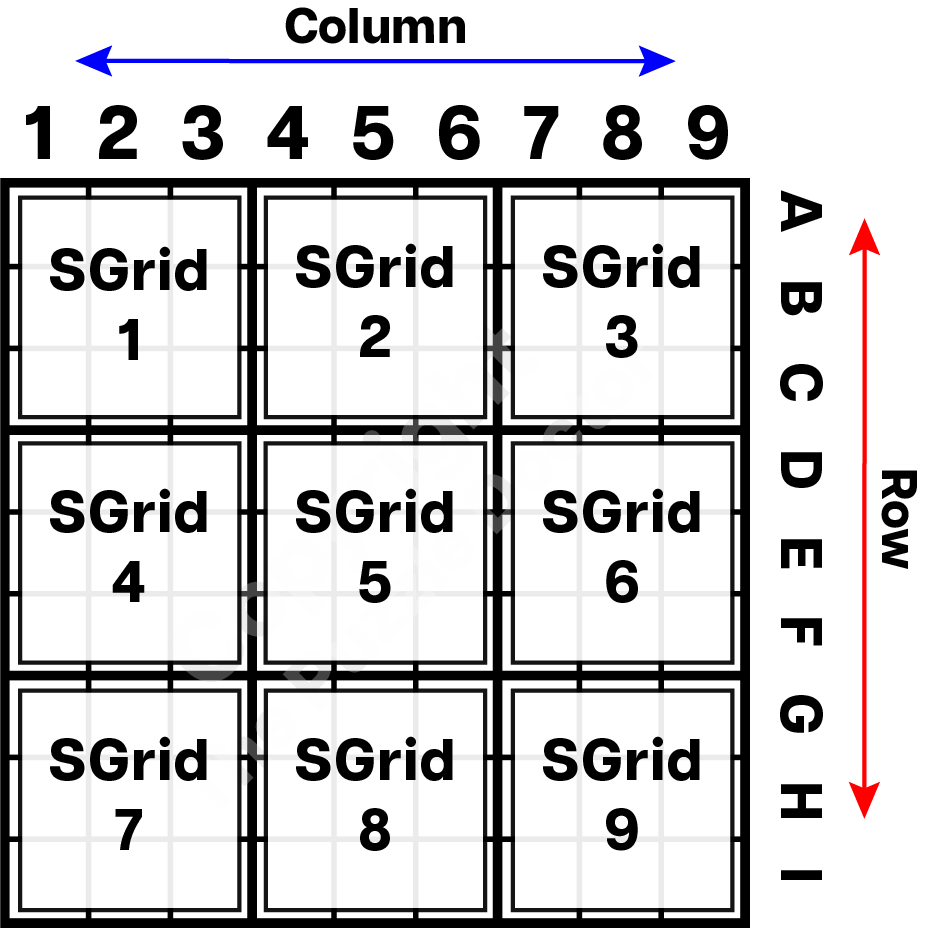
To apply the techniques on this page, we’ll use standard terms for the different parts of the puzzle:
- Grid: The complete 9×9 playing area.
- Row: A horizontal line of 9 cells.
- Column: A vertical line of 9 cells.
- SGrid: A 3×3 sub-grid (also referred to as ‘block’ or ‘Box’)
The image below illustrates the different sections:
Analyzing the Grid
Every Sudoku puzzle begins with a set of pre-filled clues called givens. While easier puzzles generally feature more givens, a puzzle’s true difficulty depends on the specific logic required to solve it.
Before applying advanced techniques, start with a quick structural scan of the board:
- Check Frequency: Identify which numbers already appear most often on the board.
- Target Full Areas: Look for rows, columns, or boxes that are only missing 1 or 2 numbers.
- Secure Quick Wins: Fill in these nearly complete sections first to open up new clues across the rest of the grid.
Start with the Obvious
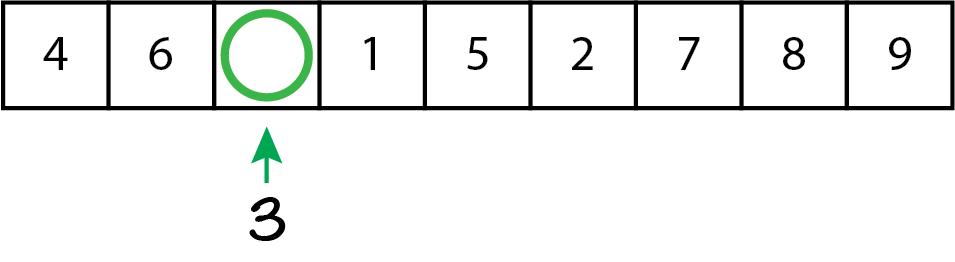
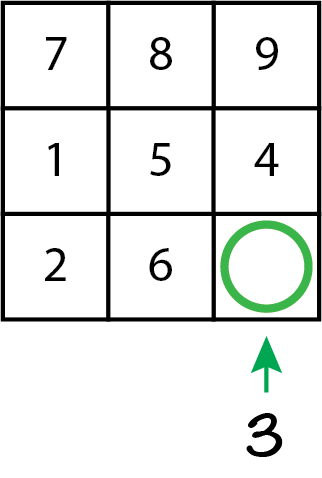
- If there is only 1 remaining number in a sub-grid, row, or column – fill it in
Basic Scanning Techniques
Scanning and elimination techniques are critical techniques that will help you solve Sudoku puzzles. They are used together with other techniques to solve Sudoku puzzles from easy to hard. Here are a few helpful basic techniques that will take your sudoku solving skills to the next level.
Cross-Hatching
- Select a Target Number: Start with a digit that already appears frequently on the grid.
- Eliminate Rows and Columns: Scan across the rows and down the columns containing that digit. Imagine lines cutting through those paths, blocking out cells where the number cannot be repeated.
- Isolate the Target SGrid: Look at a single 3×3 SGrid intersected by those imaginary lines. If only one empty cell remains open, that cell must contain your target number.

In the example above, we focus on the number 4. By tracking the rows and columns that already contain a 4, we can eliminate the grayed-out cells in the bottom-left box (SGrid 7). This leaves only one valid open spot for the 4, allowing us to fill it in securely.

Once a number is placed, you can repeat the process with another frequent digit, such as the number 9. Following the exact same technique, we track the existing 9s, cross-hatch the empty paths, and successfully isolate the only remaining spot for the 9 in SGrid 7.
The Process of Elimination
The Process of Elimination uses your initial scanning results to rule out impossible candidates from empty cells. Since a number cannot repeat within any row, column, or box, every placed digit automatically narrows down the remaining options.
- Track Your Candidates: Use small pencil marks (notations) in empty cells to keep track of potential numbers.
- Update with Every Placement: Every time you fill in a concrete number, immediately cross that digit off the notation lists in the intersecting row, column, and SGrid.
- Isolate Singletons: Watch for cells where the process of elimination leaves only one possible candidate remaining.

In the example above, placing the 9 in SGrid 7 creates a domino effect. By looking at your existing notations for the number 9, you can see that Row H is now blocked for any additional placement of the number 9. With that option crossed out, only one valid spot remains for the 9 in SGrid 9. Filling this in brings the number 9 to near-completion, leaving only two SGrids left on the entire board to solve for this digit.
Scan and Count
- Locate Nearly Full Sections: Search the board for any row, column, or box that has only a few empty cells remaining.
- Count from 1 to 9: Mentally count through the digits 1 to 9 within that specific section to identify exactly which numbers are missing.
- Fill or Note: Place the missing numbers immediately if the solution is clear, or use pencil marks to note the remaining candidates.
Scanning and counting is a very basic technique that is very useful at all levels of difficulty when playing Sudoku. Let’s revisit our nearly completed grid and take at look at sub-grid 4, where only two numbers are missing. Applying the counting method, we find that 6 and 7 are the missing digits. The method is straightforward: simply identify which numbers have not yet been used.

Looking back at our example puzzle, let’s analyze SGrid 4, which is only missing two numbers. By counting the digits already present in that sub-grid, we can easily see that 6 and 7 are the only missing numbers. While counting identifies which numbers are missing, you must combine it with scanning and elimination to determine their precise placement. In this specific scenario, we cannot yet lock down exactly which cell gets the 6 or the 7. However, this step is still incredibly valuable. Because we know 6 and 7 must live within those two specific cells of SGrid 4, we successfully eliminate them as possibilities for the rest of Column 2 (affecting SGrid 1 and SGrid 7). This narrows down options elsewhere and helps keep the puzzle moving forward.
Single Candidate Technique
The Single Candidate technique (often called a “Naked Single”) focuses on an individual cell rather than an entire row or box. It occurs when a specific cell has only one possible number left that can legally fit inside it.
- Select a Targeted Cell: Focus on an empty cell that is heavily intersected by already filled numbers.
- Check all Three Intersections: Look at every number currently occupying that cell’s row, column, and 3×3 SGrid.
- Isolate the Survivor: Eliminate all of those intersecting digits from your candidate list. If only one number survives the elimination, it belongs in that cell.
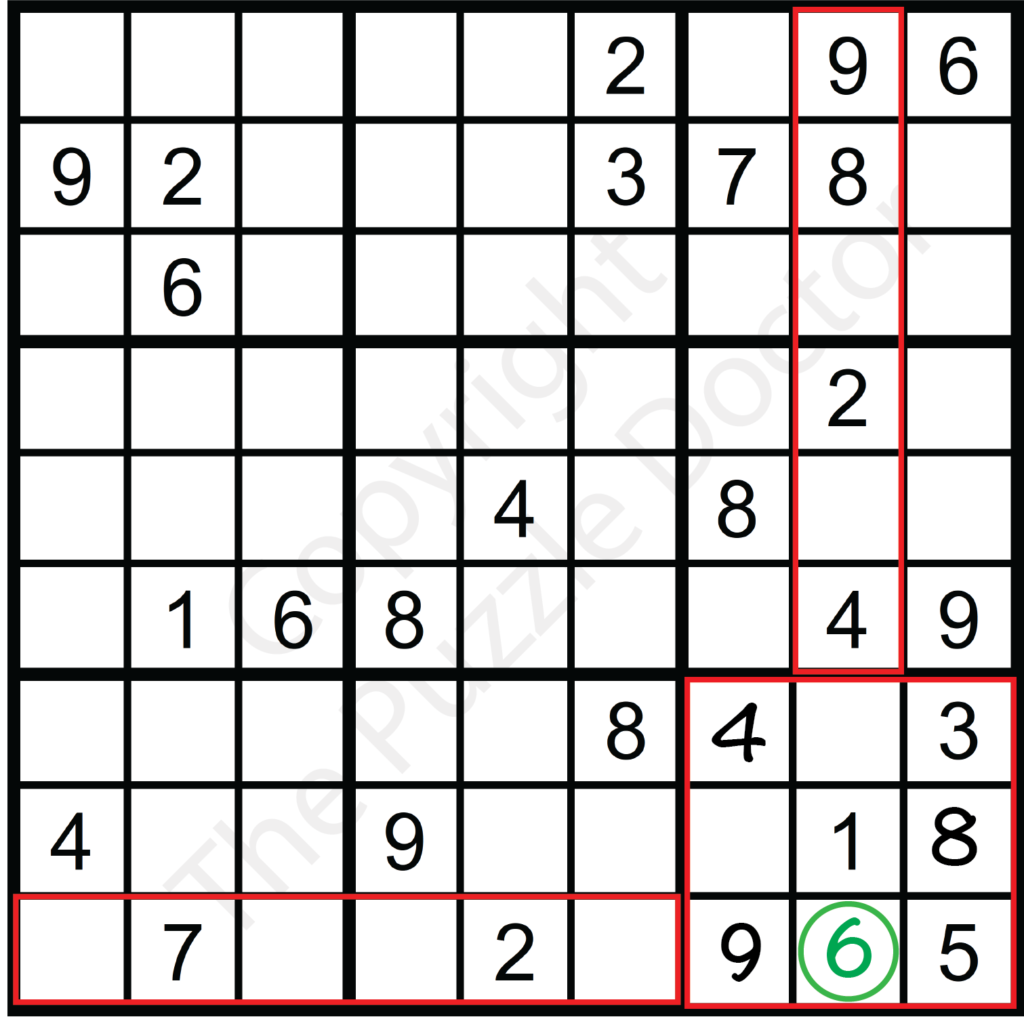
Let’s look at the example above, where scanning was previously used to place the 4 and the 9 in Box 9. Now, let’s test the empty cell located at Row I, Column 8 to see if it holds a single candidate:
- Check the SGrid (SGrid 9): The numbers 1, 3, 4, 5, 8, and 9 are already used.
- Check the Column (Column 8): Looking up the vertical line, the number 2 is already used.
- Check the Row (Row I): Looking across the horizontal line, the number 7 is already used.
By combining these three views, we have successfully eliminated eight out of the nine possible digits: 1, 2, 3, 4, 5, 7, 8, and 9. This leaves 6 as the absolute single candidate for this cell, allowing us to fill it in confidently.
Advanced Elimination Technique
When trying to place numbers, it is important to look across the entire grid for possible candidates to eliminate. You’ll want to look at the sub-grids, columns and rows. As the puzzles get more complex, you may need to look at multiple rows, columns, and sub-grids to make decisions.
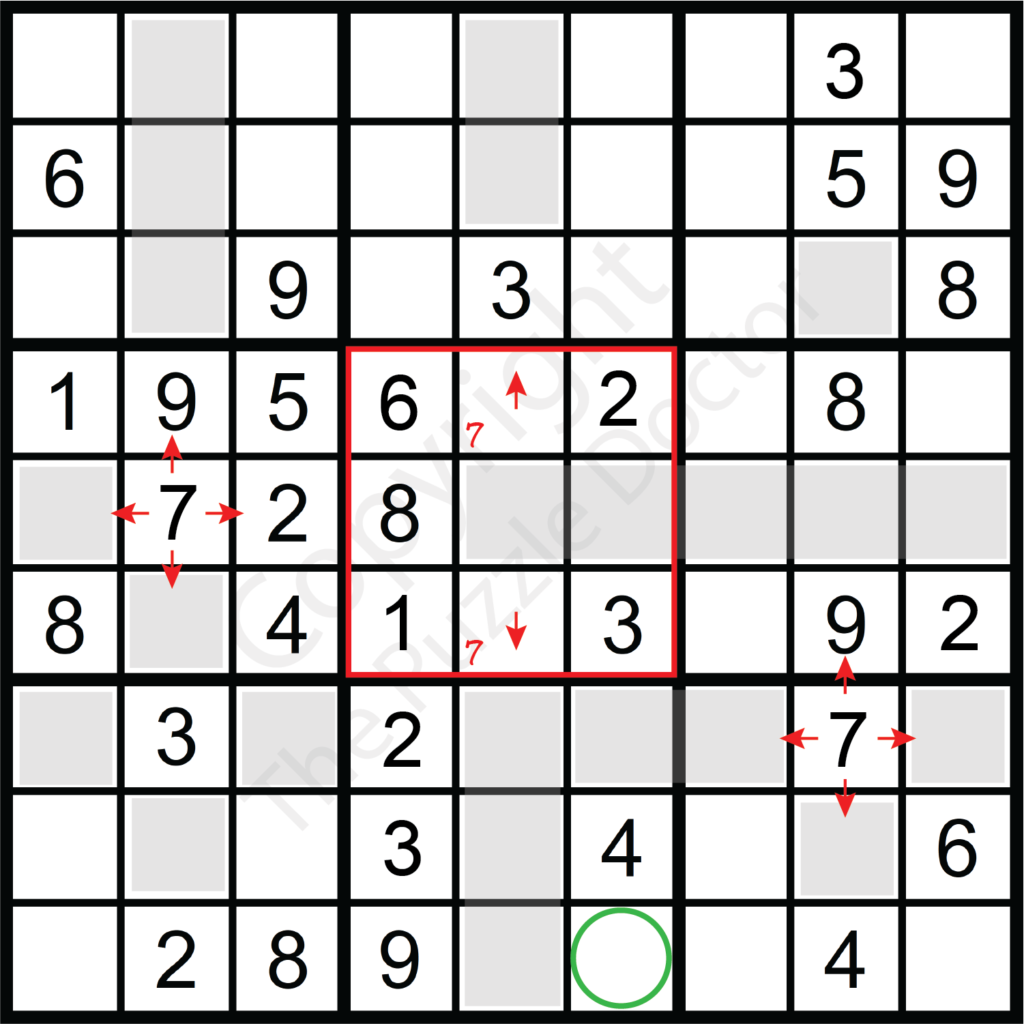
Consider the illustrated scenario when attempting to place the number 7 in SGrid 5. Because of where the number 7 in SGrid 4 is placed row E is eliminated in SGrid 5. This results in two possible cells to place the number 7 in that sub-grid, both in column 5. The number 7 is can then be eliminated from placement in column 5 across SGrid 2 and 8. In sub-grid 8, only two possible positions for 7 remain. However, by scanning to possibly eliminate one of the two cells, column 6, row G can be eliminated and 7 confidently placed in column 6 row I. In this example looking at several sub-grids as well as columns and rows was necessary to eliminate possibilities.
Common Mistakes to Avoid as a Beginner
- Resist the urge to guess; there’s always a logical solution.
- Verify each number’s placement by checking its row, column, and block.
- Balance your focus across the entire grid, not just on one section.